1a. Het begin: Ervaring en schema's
Moet je nou echt elektronicus zijn of kan iedereen dit?
Om eerlijk te zijn, ik ben zelf ook ooit begonnen bij het begin dus waarom zou u
dat niet kunnen?
Wat er verwacht wordt is een beetje redelijke soldeervaardigheid, een beetje
basiskennis elektriciteit en u moet een beetje met een universeelmeter (multimeter)
kunnen omgaan.
Allemaal beetjes dus, al doende leert u de fijne kneepjes wel.
Schema's zijn wel handig als je bezig bent met een reparatie, op
de Internet Pinball Database (www.ipdb.org)
staat zo ongeveer alles wat je altijd al wilde weten over flipperkasten maar
niet durfde vragen :-)
Om het u nog makkelijker te maken, hieronder (bij generaties) staat bij iedere
flipperkast een directe link.
1b. Gereedschap
-
Als elektronica een nieuwe wereld voor u is dan ontmoet u nu ook een paar nieuwe
gereedschappen, gelukkig is het meeste tegenwoordig goed betaalbaar en
verkrijgbaar.
- Iets van een werklamp of looplamp
- Geïsoleerde kruisschroevendraaiers nummer 2 en 3 (Phillips, geen pozidriv)
- Soksleutels 1/4" 8mm, 9mm en 10mm evt. ook een lange bithouder.
- Een punttangetje en zo klein mogelijk kniptangetje.
- Goedkope meetsnoertjes met krokodillenbekjes
- Een soldeerboutje en soldeertin 60/40 met harskern
- Iets om mee te dé solderen (solderingen los te maken)
- Een universeelmeter (Multimeter) van een beetje redelijke kwaliteit.
- Een ledje, logische probe of oude oscilloscoop *
- Een Molex krimptang voor dik draad (14-24 AWG)
In mijn winkel Flipperwinkel.nl heb ik de meeste zoniet alle zaken wel voor u liggen.
Benodigd standaard gereedschap:
Speciaal gereedschap:
* Een oscilloscoop is voor de prille beginner op het eerste gezicht een chaos
van onbegrijpelijke knopjes rond een beeldschermpje, vandaar ook dat ze zo
populair waren in oude SF films, stapel 30 van die ouwe krengen op en je hebt
het decor voor je ruimteschip al klaar :-)
In werkelijkheid is een scoop een vrij dom ding wat slechts 1 ding doet,
elektrische signalen zichtbaar maken. Kost een goede nieuwe scoop al gauw
tweeduizend euro of meer, een goede oude gebruikte heb je voor een tientje of 8.
Bedenk dat een scoop uit 1990 bij gebruik voor een flipperkast uit 1980 een relatief
modern toestel is dus een oudje van 20 jaar of meer is geen bezwaar, let op dat
de meetsnoeren er nog bij zitten, ze horen er standaard bij en zijn geen
meerprijs.
Het scherm mag geen inbrandingen vertonen en als u een koude scoop inschakelt
moet het beeldscherm binnen pakbeet een minuut oplichten.
Vermijdt de merken Heatkit, Velleman en Voltcraft plus alle oude
buizenapparaten.
Een goede Logic Probe kost meer dan een goeje ouwe scoop.
Wilt u nog niet aan de scoop?
Met een ledje en een weerstandje komt u ook een heel eind.
- Clean 'M Again van de Flipperwinkel
- Valma autowas, Goldcat, Carnaubawas, Turtlewax, Superflipp of grootmoeders bijenwas. Pak wat je hebt staan.
- Een fijn scotchbrite pannensponsje
Schoonmaakspullen:
1c. Onderdelen die je bij de hand moet hebben
Als je een elektronisch bestuurde flipperkast gaat repareren heb je zo af en toe ook onderdeeltjes nodig voor, erg lastig als je die tijdens het knutselen niet bij de hand heb dus neem van de onderstaande lijst het nodige op voorraad.
Mijn sterrensysteem geeft aan of u het onderdeel vaak, minder of zelden nodig heeft.
1 Ster heeft u
zelden nodig.
2 Sterren is een enkele keer defect.
3 Sterren is vaak defect.
4 Sterren is een verplichte vervanger of update.
-
De onderdelenlijst:
- In deze flipperkasten werden overwegend zg Slo-Blo zekeringen gebruikt, die
zijn echter in Europa lastig te verkrijgen en bovendien duur.
In de meeste gevallen kunt u ze echter prima door gewone trage zekeringen vervangen en bij de gevallen waar dat problemen oplevert heb ik die vervangen door een andere waarde en het er tussen haakjes bijgezet.
Waar er evt een snelle zekering zat vervangen we die indien nodig ook door een gewone trage zekering.- 500mA Traag (ipv 1/4A slo-blo)
- 3,15A Traag (ipv 2,5A slo-blo)
- 4A Traag
- 5A Traag
- 7A Traag
- 8A Traag
- 10A Traag
- 15A Traag
- 20A Traag
- *** TIP102 transistoren
(Eindtransistor voor spoelbesturing,vervanger voor TIP122) - *** 2N4401 transistoren (predriver voor TIP102)
- * TIP42 transistoren (lampmatrix kolommen)
- * TIP41 transistoren (lampmatrix rijen)
- * 2N6427 transistoren (lampmatrix rijen, kolom predrivers)
- ** MJE15030 en MJE15031 transistoren (hoogspanning vd displays)
- ** 2N5401 transistoren (hoogspanning vd displays)
- ** MPSA42 transistoren (hoogspanning vd displays)
- * 2N5064 Thyristoren (lampmatrix rijen)
- **** 1N4007 diodes (voor op de spoelen)
- **** 1N4763 = 91volt 1watt zenerdiode (hoogspanning vd displays)
- ** 1N4730 = 1watt 3.9 volt zenerdiode (hoogspanning vd displays)
- **** FR605 6A/1000v (sys3-6 voeding)
- ** Bruggelijkrichter 35A/1000 volt draadaansluiting nee geen faston, draad is makkelijker solderen en kost hetzelfde
- **** 15,000µF 25volt staand (5volt powersupply, dezelfde als bij WPC kasten) werkt prima en kost minder dan de helft van een liggende
- **** 100µF 150 volt liggend (hoogspanning vd displays)
- **** 0,47µF 50volt ceramisch (C32 in de blanking van sys 3 en 4) vergeten door clay
- **** 1µF 25volt tantaal (C31 in de blanking van sys 3-7) vergeten door clay
- **** 33pF 50volt ceramisch voor het over het kristal (sys 3-4) vergeten door clay
- 39K 2Watt (hoogspanning vd displays)
- 1K2 (1200 Ohm) 1/2 Watt voor updaten van de hoogspanning (Williams servicebulletin)
- 27 Ohm 3 Watt draadgewonden flameproof weerstanden, 8 per driverbord.
- 0 Ohm "weerstanden" voor het ombouwen van een driverbord naar system 7, door het gewissel van printen in kasten door de vele nitwits zijn veel driverborden niet eens geschikt voor de kast waar ze inzitten. vergeten door clay
- * 6800 microprocessor: Voor System 3 en System 4 CPU printen, deze gaat echter zelden of nooit kapot.
- 6802 of 6808 microprocessor: Voor system 6 en system 7 CPU printen. De lastig verkrijgbare 6808 kan prima worden vervangen door de 6802
- *** 6821 PIA (6820): Er worden meerdere van deze grote IC's gebruikt op alle systemen, soms tref je nog een 6820 aan maar deze kan altijd worden vervangen door de opvolger 6821
- *** 7402 of 74LS02 IC: Een standaard TTL chipje
(TTL is Transistor to Transistor Logic) we noemen dit ook wel glue logics omdat ze diverse zaken met elkaar verbinden. - *** 7406 of 74LS06 IC
- *** 7408 of 74S08 IC
- ** 74LS139 IC Adresdecoder op system 7 CPU's vergeten door clay
- * 8T28 (MC6889) Obsolete.
- * 8T97 (MC6887) or 74LS367 IC
- * 8T98 (MC6888) or 74LS368 IC
- * MC6875 klokgenerator chip: Obsolete.
- * 4069 IC
- *** PCD5101 CMOS RAM IC. Obsolete. Gebruikt op alle system 3 t/m 7 en kan het beste maar meteen worden vervangen.
- * 6810 RAM IC. Gebruikt op Sys 3 t/m 6, Obsolete.
- * 2114 RAM IC. Gebruikt op het system 7 CPU bord, Obsolete.
- * UDN6118A = UDN6184A display digit driver IC, Obsolete.
- * UND7180A Display segment driver IC, Obsolete.
- **** IC voeten met gedraaide pennen in de maten 14 t/m 40 pennen
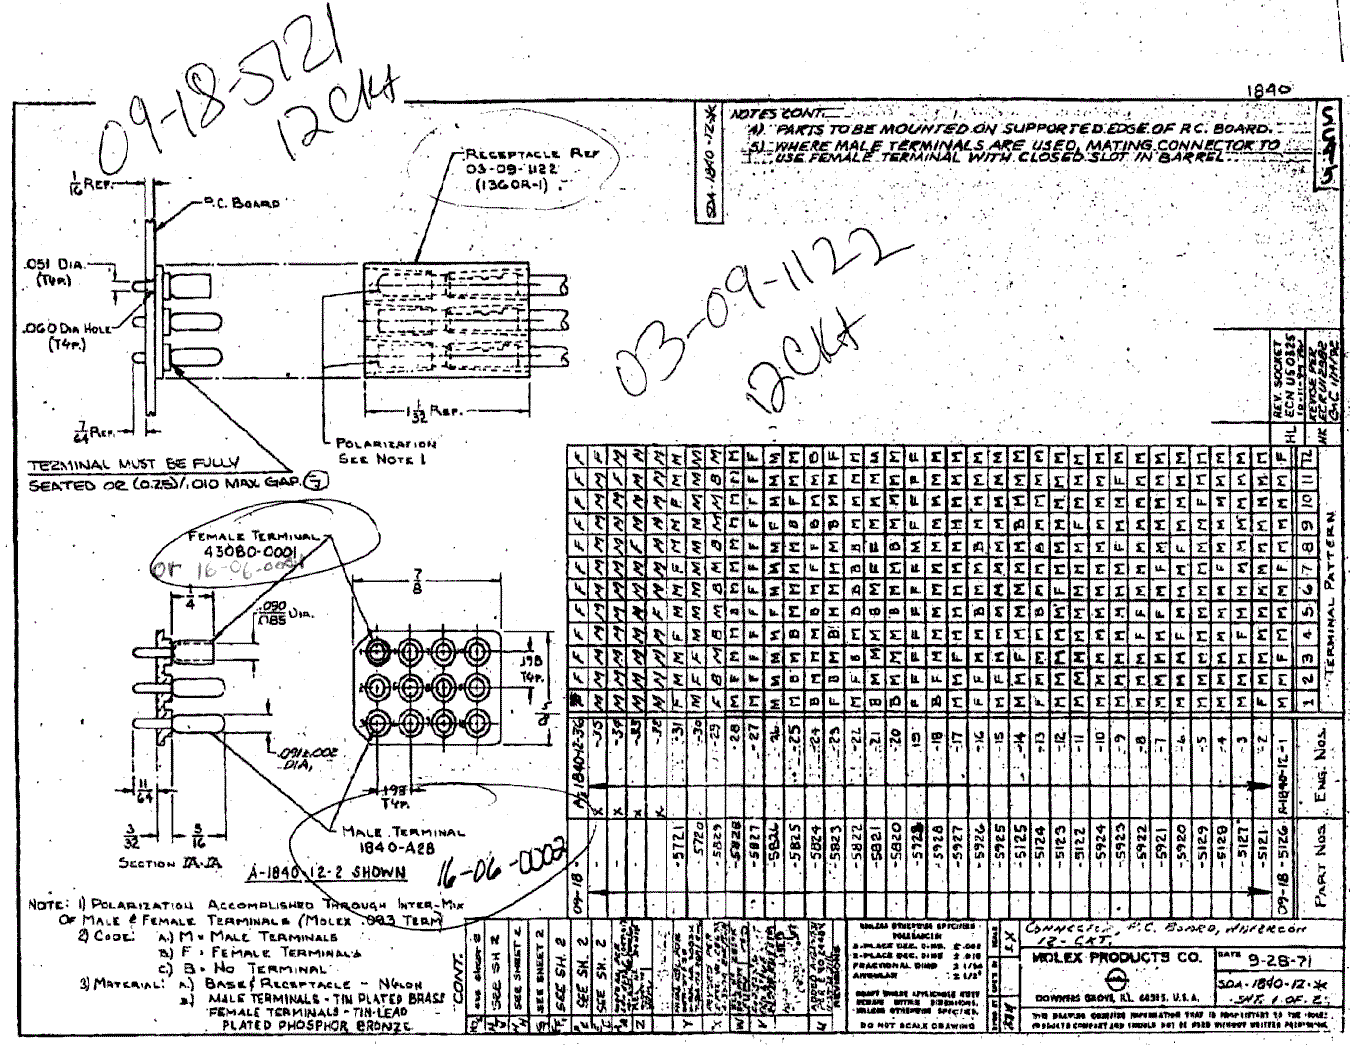
- **** 4 stuks 10pins 0.156 interrboard bottom entry connectoren
- * 4 stuks 0.156" header met lange pennen (alleen nodig als iemand ze vernield heeft door de borden aan elkaar te solderen)
- ** 0.156 Connector housings in de nodige uitvoeringen, 9 pens komt het meest voor.
- ** 0.156 Trifurcon pennen voor gebruik in de housings
- ** Keypennen voor gebruik in de housings
- *** GE44 lampjes, zorg dat je er een stuk of 50 bij de hand hebt.
- ** GE47 energiezuinige lampjes kun je evt gebruiken ipv GE44 maar ze gaan in de buurt van hard slaande mechanieken snel kapot omdat ze een dunnere gloeidraad hebben.
- * GE89 flashers lampen, slechts een paar kasten gebruiken ze.
- * Een 3.579545 MHz Kristal (gaat nooit kapot, hooguit breekt er een poot af)
- *** Flipperrevisie setjes
- *** Ballshooter tonveer: Dit is de buitenste veer die vaak door het publiek is platgeslagen
- **** Nieuwe ballen
- ** Nieuwe levelers: Soms zijn ze zo verroest dat er geen eer meer aan te behalen valt, bovendien zijn de nieuwe wat langer waardoor de kast wat steiler te stellen valt.
- **** Rubberset: Bestel meteen even de komplete set mee, het kost niet veel terwijl een fris gerubberde kast een erg hoog nieuwgevoel geeft.
Andere zaken:
Alles is uit voorraad leverbaar bij de onderdelenspecialist www.flipperwinkel.nl
De Flipperwinkel is gespecialiseerd in niet meer verkrijgbare elektronische
componenten, ook voor deze generatie flipperkasten is ieder obsolete component
gewoon uit voorraad leverbaar.
De Flipperwinkel heeft ook een grote gratis speelhal waar iedereen van harte
welkom is met vragen over zijn of haar flipperkast en de aanwezige technici leggen
u graag uit hoe u de nodige zaken moet aanpakken.
Uiteraard staan er ook Flipperkasten opgesteld uit de generatie die we hier
bespreken.
1d. Overzicht van de kasten en "generaties"
-
Hieronder vindt je de lijst van flipperkasten die er werden gebouwd binnen deze
generatie elektronische besturing.
- Grand Prix, November 1976
Het allereerste Williams prototype van een elektronische flipperkast waren één of twee omgebouwde elektromechanische Grand Prix kasten. - Aztec, November 1976
De tweede serie prototypes van Williams waren een stuk of tien omgebouwde elektromechanische Aztec's. - Hot Tip, November 1977
- Lucky Seven, Maart 1978.
- World Cup, Mei 1978
- Contact, Mei 1978
- Disco Fever, Augustus 1978
Controleer even tot welke generatie uw flipperkast behoort voordat u onderdelen gaat inkopen want er best wel enige verschillen.
Verder kunt u de naam van uw kast aanklikken om een nieuw venster te openen naar de Internet Pinball Database waar ook veel informatie over uw kast staat en vaak u ook het handboek en de schema's kunt downloaden.
Williams System 1 (experimenteel en heeft nooit de fabriek verlatenl)
Williams System 2 (experimenteel en heeft nooit de fabriek verlatenl)
Williams System 3
Williams System 4
Williams System 5
- Het "verdwenen" systeem, niemand weet meer of er ooit een flipper is ontworpen met dit systeem, misschien een "shuffle alley" of is het nooit verder dan de tekentafel gekomen?
Williams System 6
- Tri-Zone, Juli 1979
- Time Warp, September 1979
- Laser Ball, December 1979
- Gorgar, December 1979 (de allereerste pratende flipperkast)
- Firepower, Maart 1980
- Blackout, Juni 1980
- Scorpion, Juli 1980
- Alien Poker, Oktober 1980 (system 6 met zeven digit displays)
- Algar, November 1980 (system 6 met zeven digit displays)
Williams System 7
- Black Knight, December 1980
- Jungle Lord, Februari 1981
- Pharaoh, Mei 1981
- Solar Fire, Juli 1981
- Barracora, September 1981
- Hyperball, December 1981
- Cosmic Gunfight, Juni 1982
- Varkon, Juli 1982
- Warlok, Oktober 1982
- Defender, December 1982
- Time Fantasy, Januari 1983
- Joust, April 1983
- Firepower II, Juli 1983
- Laser Cue, Februari 1984
- Star Light, Augustus 1984 (enkele werden geleverd met system 9 printen)
Williams System 8 (Wordt hier niet besproken)
Zie
de Internet Pinball Database
Williams System 9 (Wordt hier niet besproken)
Zie
de Internet Pinball Database
1e. De verschillende generaties printen.
Williams introduceerde hun eerste solidstate flipperkast eind 1977, De
flipperkast "Hot Tip" werd ook nog beperkt geproduceerd als
elektromechanische kast.
Solidstate flipperkasten vanaf de eerste in 1977 (Hot Tip) tot en met de laatste
in 1984 (Star Light) hadden allemaal het dezelfde basisontwerp.
Verwijzen naar deze flippers van 1977 tot 1984 wordt vaak gedaan door ze
te benoemen naar hun revisielevel, een Black Knight wordt bijvoorveeld een sys7
kast genoemd.
Het daadwerkelijke onderdeelnummer van het processorbord staat meestal ergens in
een hoek van de print en heeft het "systemnummer" na het streepje: -3, -4, -6, -6A.
Bij System 7 CPU borden werd dit trouwens niet meer gedaan maar je herkent die in
1 oogopslag aan het 7 segments displaytje op de print.
Naast CPU revisies werden er ook wijzigingen aan de soundborden, displays,
display drivers en voedingen gedaan.
Het is dan ook best verwarrend om te weten welk bord er nou eigenlijk in welke
kast hoort.
Dit probleem wordt helaas nog eens verergerd doordat exploitanten en later hobbyïsten
de nodige printen lukraak van kast naar kast wisselden, veel van de printen zien
er op het eerste gezicht hetzelfde uit dus men dacht vaak dat ze ook 100% gelijk
waren.
| Het CPU
bord nummer in de linker onder hoek, dit is dus een System 6a revisie (Firepower). Deze notatie werd gebruikt op System 3 t/m System 6a CPU printen. System 7 CPU printen gebruiken niet deze manier van nummeren maar je herkent ze desalniettemin direct aan het 7 segments LED displaytje op de print. 
|
| Het System7 CPU
bord nummer 5764-09465-X4 in linker boven hoek. - 
|
-
System 1 en System 2 worden hier niet verder besproken.
Er is helaas ook geen informatie meer bekend over de gebruikte techniek.
System 3
Williams introduceerde in 1977 met "Hot Tip"voor het eerst commercieel
een solidstate elektronische flipperkast, het system 3 systeem was Williams eerste
productiemodel van een volledig elektronisch flipperkastontwerp en gebruikte de
Motorola 6800 microprocessor.
"Hot Tip" en de tweede elektronische flipper "Lucky Seven" hadden nog
geen elektronisch geluid maar dezelfde elektromechanische xylofoon als eerdere
EM kasten. Daarnaast vond iemand het in een vage nostalgische bui nodig om een
mechanische tellerrol onderin het cabinet te monteren (zonder nummers op de
telrol!!) van Hot Tip en Lucky Seven, dit werd de "noise maker"(lawaaimaker)
genoemd op het elektrische schema. Deze teller tikte mee tijdens het scoren om
het geluid te simuleren wat de oudere EM kasten maakten.
Elektronisch geluid werd in 1978 geïntroduceerd bij de derde system 3 kast
"World Cup" en het telwerk onderin werd nu ook weggelaten.
Het soundbord in alle system 3 en -4 kasten tot aan Tri-zone zat onderin het
cabinet en niet in de kopkast, de volumeregelaar was dus makkelijk
bereikbaar vanuit de muntdeur.
Alle instellingen van de kast werden gedaan door het verstellen van dipswitches
op de processorprint waarna deze "waarden" met een toets in het
geheugen moesten worden ingevoerd, makkelijk volgens Williams, volslagen
rampzalig volgens de operators die de kasten wilden instellen en vervolgens
knettergek werden van de onduidelijke lijsten met dipswitchsettings in het
handboek.
Twee 512 bytes grote PROMs bevatten de kastspecifieke software op lokaties IC21
en IC22 en twee 2716 EPROMs of 2316 masked ROMs fungeerden als de "Flipper ROMs"
op lokatie IC17 en IC20. Op lokatie IC14 vindt u geen IC voet maar wel de
printsporen en soldeereilandjes om er eentje te kunnen aanbrengen. Het latere IC26
(voor een zesde ROM) is niet aanwezig en er zijn ook geen mogelijkheden dit aan
te brengen.
De batterijhouder zit bij deze print linksmidden net boven de ROMs/Eproms.
system 3 CPU borden kunnen zowel system 3 als -4 software "draaien"
en vaak ook system 6 software (uitgezonderd Firepower)
system 3 CPU borden zaten in
Hot Tip, Lucky Seven, World Cup, Contact en Disco Fever.
System 4
Het system 4 processorbord werd in 1978 bij de release van Phoenix geïntroduceerd
en bevatte diverse kleine verbeteringen ten opzichte van zijn voorganger,
ondermeer een verbeterd resetcircuit, de 6800 CPU processor werd behouden samen
met zijn externe MC6875 clockgenerator (die gewoon nog leverbaar is bij de
Flipperwinkel). Vanaf Flash in 1979 introduceerde Williams het idee van continu
achtergrondgeluid (en dus ook een bijhorende nieuwe geluidsprint). De
instellingen van de kast konden voortaan vanuit de muntdeur met een drietal
toetsen worden gedaan in plaats van de superonhandige dipswitches op het CPU
bord (hoewel de dipswitches in kwestie gewoon op alle printen zijn blijven
zitten en de printen daardoor backwards compatible bleven).
Een extra ROM voetje werd toegevoegd op de plek van IC14 zodat er een extra 2716 EPROM
kon worden geplaatst(2048 bytes) in plaats van de twee
512 bytes grote PROMs op positie IC21 en IC22.
System 4 CPU borden kunnen dus OF twee 512 byte ROMs in IC21 en IC22 gebruiken
OF één 2716 EPROM in IC14 en altijd twee 2716 EPROMs of twee 2316 masked ROMs
als "flipper ROMs" in IC17 en IC20.
Er zit bij system 4 ook een extra IC voet op positie IC26 net onder de
batterijhouder die net als bij system 3 links midden net boven de roms zit.
System 4 CPU borden kunnen zowel system 3 als system 4 software draaien en
bovendien de meeste system 6 software, system 7 software kan echter niet op
"lagere" borden worden gedraaid omdat deze software "op zoek
gaat" naar de tweede PIA op het CPU bord.
System 4 CPU borden werden geïnstalleerd in Phoenix, Pokerino, Stellar Wars en Flash.
Er schijnt ook nog een "system 4- bord" te bestaan, het is gelijk aan een normaal system 4 bord maar de IC voeten op positie IC26 en IC14 werden niet geplaatst.
System 5
Hierover is geen informatie bekend.
System 6
Het system 7 processorbord werd geintroduceerd eind 1979.
Het is het meest geproduceerde bord van allemaal, ruim 100.000 printen.
Er werden nogal wat opzienbarende wijzigingen aan het ontwerp aangebracht.
De komplete layout werd gewijzigd tov zijn voorgangers en een memory protect
schakeling werd toegevoegd.
Williams heeft de 6800 microprocessor vervangen door de 6802/6808 processor die
geen extern clockcircuit meer nodig had (de MC6875 clock was dus ook niet langer
nodig omdat deze rechtstreeks in de 6802/6808 zit).
Tegelijk introduceerdere Williams spraak in de flipperwereld in 1979 met
Gorgar en zijn vacabulaire van zeven woordjes.
System6 kasten gebruiken drie 512 byte ROMs in IC21,IC22 en IC26 of een 2716 EPROM
of 2316 masked ROM in IC14.
De flipper ROMs in IC17 en IC20 konden twee 2716 EPROMs of twee 2316 masked ROMs
zijn met als enige uitzondering Firepower die 512 byte PROMs in IC21,IC22 en
IC26 gebruikte EN een 2716 EPROM in IC14
(CPU board jumper J4 moet dan geïnstalleerd zijn en J3 moet verwijderd zijn).
Er is ook een wijziging mogelijk om een CPU board voor Firepower te gebruiken
met gebruikmaking van één enkele 2732 EPROM in IC14 (en geen ROMs in IC21,IC22
en IC26),
plus de twee 2716 flipper EPROMs in IC17 en IC20 (zie the ROM
section van deze pagina).
De Batterijhouder zit nu rechtsonder op de print.
System 6 CPU borden werden geïnstalleerd in Flash (aan het eind van de productie), Tri-Zone, Time Warp, Gorgar en Laserball.
System 6a
System 6a had slechts een zeer kleine revisie tov zijn voorganger, de
buffer IC's IC9 en IC10 werden uit het ontwerp geschrapt en er werden dummies met
draadbrugjes voor in de plaats gezet.
System 6a CPU boards werden geïnstalleerd in Firepower, Blackout, Scorpion, Algar
en Alien Poker.
System 7
Het System 7 processorbord werd geïntroduceerd eind 1980 met Black Knight (de
paar eerste Black Knight kasten hadden nog wel een system voeding).
Net als zijn voorganger gebruikt dit bord de
6802/6808 microprocessor.
Voor de beginner is dit bord makkelijk te herkennen aan het kleine display op de
print.
Alle system 7 flipper gebruiken 7 digit score displays (system 3 t/m system 6
gebruikten nog zes digit numeric displays behalve Alien Poker & Algar).
Met uitzondering van het soundbord zijn alle printen flink gereviseerd ten
opzichte van hun voorgangers. Williams probeerde met het system 7 processorbord
nog wel een
backwards compatibiliteit aan te houden maar daarvoor moet het bord worden
omgejumperd of je moet met een epromprogrammer de software op een andere manier
in eproms branden. Bij de Flipperwinkel hebben de technici dit overigens
succesvol uitgetest. Latere system 7 kasten hadden 50volt flipperspoelen ipv de
tot dan toe gebruikelijke 28 volt, hiertoe werd een extra voedingsprintje
geplaatst en een ander type transformator. De meeste system 7 processorprinten
zijn zo gejumperd dat ze 3 2716 (IC14,IC20,IC26) en 1 2532 eprom (IC17)
gebruiken uitgezonderd Defender en Hyperball.
Met betrekken tot Hyperball: Het processorbord hiervan is gelijk aan alle andere system 7 printen, dit gaat ook op voor de voeding en de displays, de jumpers staan echter anders maar het grootste verschil zit in een speciaal driverbord wat uitsluitend in Hyperball werd gebruikt en niet geschikt is voor enige andere flipperkast.
------------------------------------------------------------------------------
Flipper ROMs.
Flipper ROM's werden gebruikt in alle Williams flipperkasten uit deze periode.
In feite bevatten de Flipper ROM's het BIOS van het computersysteem in de kast,
het bevat de algemene software die in meerdere flipperkasten werd gebruikt, deze
software bevatte de uitlezing van switches, aansturing van spoelen, lampmatrix
besturing enz maar ook de diagnostische software.
Daarnaast had iedere kast 1 of meerdere ROM's met daarin de kastspecifieke
software waarin de spelregels stonden.
Oorspronkelijke dachten we dat ze naam "Flipper ROM's s" hadden
gekregen om ze te onderscheiden van bijvoorbeeld "Shuffle ROM's".
Maar gebleken is dan de shuffle alleys die dezelfde CPU- en driverboards
gebruikten dezelfde "Flipper ROM's" gebruikten (aldus Larry Demar)
Dus de oorsprong van de naam "Flipper ROM's" blijft onduidelijk.
De Flipper ROM's werden onderscheiden door een kleurcode: White, Yellow,
Green en Blue. De kleuren hoorden min of meer bij de verschillende systemen (er
was enige overlap en ook een uitzondering)
Het principe is echter: White=system 3, Yellow=system 4, Green=system 6 en Blue=system
7).
De uitzondering hierop is World Cup die een helemaal kastspecifieke Flipper ROM
2 heeft in IC17. Zonder deze eigen ROM zal de kast niet booten.
Een processorbord bevat altijd 2 Flipperroms op posities IC17 en IC20,
dit kunnen 2716 eproms zijn of 2316 masked ROMs, alleen bij system 7 werd er een
2532 eprom gebruikt in IC17.
Let er op dat Williams en een aantal system 7 IC20 van verkeerde labeltjes heeft
voorzien, de 2532 eprom gaat echter altijd in IC17 en de 2716 in IC20)
Vervangen van ROM's
Als er in de kast nog oude masked ROM's zitten(dus chips zonder raampje) kun
je die het beste vervangen, deze ic's zijn na meer dan 30 jaar meestal onstabiel
geworden, vervangen is dus de beste optie. Zitten er echter eproms in dan zijn
die in de regel nog prima te gebruiken, plak wel een nieuw labeltje over het
raampje als het oude weg is.
Nieuwe Flipper ROM's worden exact zo geleverd als ze waren, je steekt ze terug
op de orignele plaats, liefst in nieuwe IC voetjes.
GAMEROM's worden voor system 3 -4 en -6 altijd als 1 enkele eprom geleverd welke
in IC14 wordt geplaatst.
Voor system 7 geldt dat er 4 nieuwe worden geleverd die 1 op 1 worden
uitgewisseld.
Wat werkt er nou met welke systeemgeneratie samen?
Hieronder een beetje een overzicht van wat je nou naar welke kast kunt wisselen.
- Printen uit system 3 t/m system 6 kasten zijn over het algemeen het meest compatibel met elkaar. Ze gebruiken allemaal hetzelfde driverbord (op de weerstanden in de switchdrive na), het display driverbord (masterdisplaybord) is gelijk en de CPU printen zijn backwards compatibel.
- De uitwisselbaarheid van de CPU borden is dus backwards (achteruit),
dat wil zeggen dat een nieuwer type bord in een oudere kast gebruikt kan
worden, omgekeer is in veel gevallen ook wel mogelijk trouwens maarop zijn
uitzonderingen. Het behoeft geen betoog dat de software mee moet worden
gewisseld.
Zelfs een system7 CPU (met de extra 6821PIA) kan backwards in een oudere system 3 t/m 6 kasten worden gebruikt mits de software er op de juiste manier in wordt geplaatst.
Andersom is niet mogelijk -3 t/m -6 CPU printen kunnen nooit worden gebruikt in system 7 kasten ivm de extra PIA. - De driverborden zijn allemaal met elkaar uitwisselbaar mits de
weerstanden van de switchmatrix kolomdrivers worden aangepast (de uitzondering
hierop is Hyperball die een uniek driverbord gebruikt.
Alle andere driverborden kunnen dus in alle system 3 t/m 7 kasten worden gebruikt. Bij system 3 drivers horen er weerstandjes van 1000 ohm te zitten op positie R204 t/m R211, latere kasten hadden daar 330 ohm weerstanden en de laatste generatie (system 7) had nul ohm "weerstanden".
Deze verlaging was nodig om meer stroom door de switchmatrix te sturen ivm het grotere aantal gelijktijdig bediende switches (multiball kasten) maar ook de steeds toenemende balsnelheden veroorzaakten steeds kortere schakelmomenten waarbij een wat hogere stroomsterkte op de kolommen betere switchuitlezing gaf.
Een system 7 driverbord kan probleemloos in -3 -4 en -6 kasten worden gebruikt, omgekeerd moet je eventjes de 8 weerstanden R204 - R211 vervangen door draadbruggen of netter, door 0 Ohm weerstandjes. - De voeding van de 2 eerste system 3 kasten, Hot Tip en Lucky Seven,
voorzag in 300 volt voor de display driver, bovendien hadden deze 2 kasten een
zekering op de voedingsprint zitten voor de algemene verlichting (GI) Zowel de
300 volt als de zekering vervielen vanaf de derde system 3 kast World Cup.
Deze voedingsprinten zijn dus alleen uitwisselbaar tussen deze 2 kasten.
Alle latere voedingen van system 3 t/m 6 flipperkasten zijn echter uitwisselbaar binnen de hele serie latere kasten maar niet in system 7.
System7 voedingsprinten zijn echter wel weer backwards compatibel met system 3 tot en met system 6 en hadden drie extra connectoren (3J7,3J8,3J9) voor het GI relais en de GI voeding. Deze drie connectoren worden bij gebruik van de voedingsprinten in eerdere kasten niet gebruikt. - Voor de transformatoren van de kasten geldt ook weer dat de eerste twee
kasten (Hot Tip en Lucky Seven) een 300 wikkeling hadden op de trafo voor de displayvoeding
en dat de aansluiting voor het GI circuit naar de voedingsprint liep.
Van World Cup t/m Algar (de laatste system 6 kast) zijn de transformatoren uitwisselbaar, er zit geen 300v wikkeling meer op en de GI wordt aangesloten op de losse zekeringhouders in de backbox.
Bij system 7 kasten kasten loopt de voedingbedrading voor de GI echter weer wel naar de voedingsprint. Mocht je toch een trafo wisselen zorg dan voor correcte aansluiting van de GI.
System 3 t/m 6 kasten en de paar eerste Black Knights hadden de transformator in de kopkast zitten, bij alle latere kasten bevindt de trafo zich in de onderkast, waarschijnlijk om warmteproblemen te voorkomen. Tenslotte hadden de drie laatste system 7 kasten een extra 50volt lwikkeling voor de flipperspoelen en een extra gelijkrichtprintje (Firepower 2 en later)
Vroegere trafo's kunnen dus niet in deze kasten worden gebruikt, onderling zijn ze uiteraard wel uitwisselbaar. - Williams gebruikte in totaal drie verschillende soundborden in deze
kasten serie (met hier en daar wat kleine wijzigingen).
World Cup (system 3) tot en met Pokerino (system 4) hadden hetzelfde soundbord
wat alleen maar basisgeluidjes kon spelen. Flash (system 4) tot en met Algar (system
6) gebruikten een ander type soundbord wat ook continugeluid
(achtergrondgeluid) kon produceren.
Gorgar (system 6, de eerste pratende flipperkast), Firepower, Blackout, Alien Poker, Black Knight (system 7), Jungle Lord, en Pharoah gebruikten een soundbord met daaraan gekoppeld een spraakbordje waarop zich 3 of 4 eproms met soundsamples bevonden. Vanaf Solar Fire werd er gebruik gemaakt van hetzelfde soundbord maar zonder het spraakbordje, (ook de connector voor het spraakbordjes werd van de print weggelaten)
De spraak in de Williams flipperkasten kwam trouwens pas weer terug in de system 9 kast Space Shuttle.
Iedere flipperkast heeft uiteraard zijn eigen soundsoftware dus zorg bij uitwisselen van een print dat je de juiste eprom terugplaatst. - System 9 kasten gebruiken dezelfde voedingsprinten en displays als system 7 kasten. De spraak zat op een zelfde printje als bij eerdere sprekende kasten met als enige verschil dat de spraakbordjes anders gejumperd waren en 2732 eproms gebruikten ipv de verouderde 2532.
Het Williams 3 tot en met 6 printontwerp.
Alla Williams system 3 t/m 6 kasten hebben in beginsel hetzelfde ontwerp als
grondslag, in feite hebben zelfs de system 7 CPU's dit alhoewel hier gebruik
werd gemaakt van dynamic RAM en een extra PIA.
Williams en enkele andere fabrikanten gebruiken een zogenaamd split board
ontwerp, hierbij werden functies gescheiden en op verschillende printplaten
gezet om de reparatie op lokatie te vereenvoudigen. Een monteur hoefde in zo'n
geval slechts de defecte print uit te wisselen en vervolgens mee te nemen naar
de reparatiewerkplaats. Hierbij speelde de gedachte dat een driverbord veel
vaker kapot zou gaan dan een CPU bord een grote rol, het veel ingewikkeldere
processordeel had immers nauwelijks te lijden terwijl het driverbord met zijn
eindtransistoren dat wel degelijk had.
Als de printen als 1 geheel zouden worden ontworpen moest de monteur bij het
wisselen ook de eproms omwisselen of nieuwe plaatsen, hij moest de instellingen
opnieuw doen en de elektronische boekhouding zou niet langer kloppen.
Door alleen de driver te wisselen was dit alles zelden meer nodig.
Dit idee bleek bewaarheid, mettertijd bleken de driverborden inderdaad
veel vaker kapot te gaan dan de CPU borden. Wat Williams en andere fabrikanten
echter over het hoofd zagen was het toenemen van het aantal connectorproblemen
naarmate de flipperkasten ouder werden. Bij Gottlieb ontstonden de meeste
problemen doordat ze gebruik hadden gemaakt van Homecomputer Side Edge
connectoren die gevoelig bleken voor lage contactdruk en geoxideerde
printsporen. Williams daarentegen ondervond ernstige problemen door het gebruik
van de beruchte interboardconnector waar de volledige data- en adresbus doorheen
liepen, erger nog, ook het blankingsignaal liep door de connector en dat ook nog
eens precies onder de batterijen bij system 3 -4 en vooral -7, het minste beetje
batterijlekkage zorgde al meteen voor het uitvallen van de blanking.
Er ontstaat nu een domino effect, een computercrash die veroorzaakt wordt door
een slechte connector zou moeten worden afgevangen door de blanking die alles
uitschakelt, deze blanking echter werkt niet meer door falen van diezelfde
connector.
Nou zou je verwachten dat een blanking failsafe wordt ontworpen, dus een falend
blankingsignaal schakelt dan alles UIT.
Helaas was bij Williams het omgekeerde het
geval, een defect aan de blanking veroorzaakt juist een onnodig aansturen van de
diverse spoelen en lampen.
De gevolgen laten zich raden, het was geen uitzondering dat 10 of
meer spoelen tegelijkertijd doorbrandden in de kast, lampen permanent bleven
branden en weerstanden kompleet de print afbranden.
Om de feestelijkheden kompleet te maken waren de in de schakeling van de
blanking gebruikte condensatortjes C31 en C32 van zeer slechte
kwaliteit, was de interboardconnector eens een keer niet de oorzaak van dikke
rookwolken dan waren deze twee C'tjes het wel.
Kan er nog meer tegelijkertijd verkeerd gaan?
Uh ja :(
Op system 3 t/m 6 printen werden vaak
IC voeten gebruikt van het merk Scanbe die een dermate slecht contact maakten
met de ROM's of eproms dat bij de geringste klap tegen de kast de
computerschakeling ook nog eens daardoor vastliep.
En nee, geen blanking dus om de boel te redden.
Dit alles had als gevolg dat er een vuistregel ontstond: "Als een Williams
kast nog werkt blijf er dan zoveel mogelijk vanaf en verkoop het kreng
snel"
Maar goed, alles kasten delen hetzelfde basisontwerp met 5 printen: Een
CPU bord, een driverbord, een voeding, een displaydriver en de displays zelf.
Alle kasten na Lucky Seven hadden ook nog een soundbord en latere system 6
kasten van Gorgar t/m system 7 Pharaoh hadden een spraakbordjes.
Alle system 3 en de meeste system 4 kasten hadden het soundbord onderin
de kast zitten, in feite was het een directe vervanger van de vroegere bellen
die daar zaten (het soundbord werd ook aangestuurd door dezelfde transistoren
die vroeger de spoelen van de bellen lieten aantrekken).
Williams was indertijd zeer huiverig voor deze verandering van bellen naar
elektronisch geluid, door het aansluiten van het soundbord op de plaats van de
bellen hielden ze ook de mogelijkheid open om er bellen in terug te plaatsen
mochten er klachten komen van spelers.
De plaatsing onderin het cabinet maakte het ook de bereikbaarheid van de
volumeregelaar makkelijk vanuit de muntdeur.
Vanaf system 4 en latere kasten werd het soundbord echter in de kopkast
geplaatst vlak boven de voedingsprint.
| Een blik
binnenin de kopkast van de eerste system 3 kast "Hot Tip". In de
blauwe cirkel op de voedingsprint zie je de GI connector met de dikke gele
draden, deze connector verbrandt zowat altijd. Na Hot Tip en Lucky Seven
werd de GI zekering verplaatst naar een apart zekeringbordje zodat er dus
geen GI connector meer op de print nodig is en Williams van de
connectorproblemen af hoopte te zijn. In de rode cirkel onder laat de batterijhouder zie je dat er daar nog geen soldeereilandjes voor de latere voet van IC26 aanwezig zijn. De andere rode cirkel laat IC14 zien waar deze wel aanwezig zijn maar de voet nog niet. - 
|
| De kopkast
van World Cup en de erna geproduceerde system 3 kast "Disco Fever". World Cup t/m Stellar Wars hebben het soundbord onderin de kast zitten en een enkele GI zekering op een zekeringbordje onder de voedingsprint. 
|
| Een kijkje
binnenin een system 6 kast (Tri-Zone t/m Laser Ball). Je ziet dat het soundbord nu rechtsboven de voedingsprint zit en de verlichtingszekeringen (drie nu) zitten nog steeds op een apart bordje onder de voeding vlak boven de Big Blue condensator. De batterijhouder zit bij deze system 6 CPU aan de rechterkant. 
|
| Tenslotte
een kijkje in een typische system 7 kast (Black Knight). Het nieuwe type
soundbord zie je rechtsboven het nieuwere type de voeding zitten. LET OP! Zeer veel Black Knights in Nederland zijn early production kasten en hebben nog het oude type voeding en ook de transformator zit dan nog bovenin de kopkast. De meeste system 7 kasten hebben echter de transformator niet langer bovenin zitten maar onderin het cabinet, dit werd gedaan om de warmte in de kopkast wat te verminderen. De zekeringen voor de verlichting zitten bij het nieuwe type voeding weer op de voedingsprint (uitgezonderd de early production Black Knights waar de zekeringhouders EN een extra GI relais apart in de kop werden gemonteerd) Williams was blijkbaar de les uit het verleden mbt de GI connectoren vergeten want het resultaat was dat deze wederom totaal verbranden. Op het CPU bord zit nu de batterijhouder rechtsonder. 
Foto van Early Production BK toevoegen |
Het CPU (Central Processing Unit) Bord
In tegenstelling tot Bally wordt de besturingsprint bij Williams CPU bord
genoemd (Bij Bally was dit een MPU oftewel een Master Processor Board) Gewoon 2
namen voor hetzelfde stuk techniek.
Een processorbord bevat de centrale verwerkingseenheid (microprocessor), de in-
en output IC's(noemen we verder PIA wat op zijn beurt weer staat voor Peripheral
Interface Adapter), de software op ROM(Read Only Memory) of EPROM(Erasable
Programmable Read Only Memory), één of meer RAM(random access) geheugens en de
nodige kleinere ICtje's uit de TTL(Transistor Transistor Logica) en CMOS(Complementairy
Metal Oxide Semiconductor) reeks die alles via logische schakelingen met elkaar
verbinden.
Het geheel vormt vervolgens een eenvoudige computer die de software uitvoert
waarmee de flipperkast wordt bestuurd maar waar in meer of mindere mate ook zelf
diagnotische software op draait welke met een paar LED's of een minidisplay kan
worden uitgelezen door de monteur.
Williams flipperkasten gebruikten de populaire Motorola 6800/6802 serie.
In tegenstelling tot Bally voert het processorbord bij een Williams kast geen
volledige zelftest uit, er vindt bij een power-up slechts een zeer korte
controle van het RAM geheugen plaats en mochten er kritische componenten defect
zijn dan loopt de processor doodgewoon vast of raakt in een eindeloze lus.
Een echte zelftest voert de print alleen uit nadat deze is gestart en er door de
monteur op de diagnose toets wordt gedrukt.
Verwar dit laatste niet met de testknop in de muntdeur, deze voert de monteur
door een volledige controle van de speelveldonderdelen maar geeft ook toegang
tot de instellingen en de boekhouding.
|
Een system 3 CPU bord met 6800 micrprocessor en één 6821 PIA. Systems3 and System 4 printen zijn zo goed als gelijk, het enige verschil is de mogelijkheid er een extra IC voet op te plaatsen tbv IC26 Op onderstaand system 3 bord is naar system 4 "omgebouwd" door het plaatsen van de voet voor IC14 en daar een Eprom in te steken. 
|
| Een system
6 CPU bord met 6802/6808 microprocessor en één 6821 PIA. De batterijhouder zit hier helemaal op de rechter onderrand. 
|
| Een system
7 CPU bord met 6802/6808 microprocessor en twee 6821 PIAs. De batterijhouder zit nu aan de linkerkant en een enkel 7-segments LED displaytje zit er vlak boven, rechtsboven zie je de toegevoegde 40 pens 6821 PIA waarmee voortaan het geluid en de display komma's worden aangestuurd. De layout van deze print is behoorlijk vernieuwd, toch is de architectuur ervan in principe nog altijd gelijk aan zijn voorgangers en het bord is dan ook nog altijd backwards compatibel met system 3 t/m system 6 kasten. 
|
-
Het driverbord met zijn drie PIA's
Het driverbord is in feite gewoon een onderdeel van het CPU bord. De "driver" is verantwoordelijk voor de controle over spoelen en lampen en leest bovendien bijna alle switches uit. De microprocessor in deze flipperkasten communiceert met de rest van de gebruikte onderdelen(randapparatuur) via een stel PIA's(Peripheral Interface Adapter). Deze IC's zijn van het type 6821, (op de oudste borden tref je ook nog wel eens de voorloper 6820 aan die gewoon uitwisselbaar is met de 6821).
In een Personal Computer zijn voorbeelden van randapparatuur het toetsenbord, de diskdrive/harddisk, een modem, monitor enz.
In een flipperkast bestaat de randapparatuur uit spoelen die de bal over het speelveld laten rollen, contacten die "zien" waar die bal tegenaan rolt en de displays waar u de score vanaf kunt lezen. Een PIA heeft binnen de computerarchitectuur een "adres", net zoals een RAM geheugen of EPROM dat heeft en wordt beschreven of gelezen door de microprocessor. De software van de flipperkast laat de microprocessor de PIA lezen of beschrijven, op deze manier wordt geregistreerd dat een bepaalde switch op een bepaald moment wordt gesloten of dat een bepaalde spoel moet worden bekrachtigd. Ook het tonen van de scores op de displays wordt op deze manier bewerkstelligd.
Een PIA van het type 6821 heeft 16 in- of uitgangen plus nog een tweetal extra lijntjes die vrij bestuurbaar zijn.
De functie van een PIA's is redelijk vrij programmeerbaar, er kan worden ingesteld dat de 16 IO lijnen allemaal ingangen zijn, of allemaal uitgangen, of 8 in- en 8 uitgangen.
De "drivers" die in system 3 t/m 7 kasten werden gebruikt zijn
bijna helemaal gelijk, alleen de switchmatrixweerstanden verschillen tussen de
diverse generaties. System 3 driverborden hadden 1000 ohm switchmatrixweerstanden
op positie R204-R211, latere drivers hadden daar 330 ohm weerstanden zitten en
vanaf system 7 waren het 0 ohm draadbruggen of 0 ohm "weerstanden".
De verlaging van de weerstandswaarde werd gedaan om een hogere stroom door de
switchmatrix te bewerkstelligen zodat snel sluitende switches en in geval van
multiball kasten meerdere tegelijkertijd sluitende switches correct konden
worden uitgelezen.
Een system 7 driverbord kan probleemloos worden gebruikt in een eerdere
generatie en is dus volledig backwards compatibel.
Alleen voor Hyperball werd ene uniek driverbord ontworpen, dit bord is niet
uitwisselbaar met enige andere flipperkast.
Omgekeerd moet een vroeger bord (afkomstig uit system 3 t/m 6) niet in een
system 7 kast worden geplaatst zonder de weerstanden eerst te vervangen door
draadbruggen.
| Het
driverbord met zijn drie 6821 PIA's. Op deze print zie je dat iemand de blunder heeft begaan om de oude koolfilmweerstanden te vervangen door veel te zware 5watt straalkachels die bij een crash de print zullen verbranden. Indien echt nodig zijn drie watt flameproof metaalfilmweerstanden de beste vervanger. 3watt draadgewonden mag ook. Maar als de originele weerstanden gewoon nog werken is er geen reden om die te vervangen, hoe zwart ze er ook uit mogen zien. 
|
-
System 3 t/m system 6 kasten gebruikten 4 PIA's, Eén PIA op het CPU bord voor
het aansturen van de displays (hoewel er echter de PIA een extra 74154 werd
ingezet om nogmaals 12 extra outputs te creëren. Op een system 7 CPU bord
zitten 2 PIA's waarvan er eentje nu het soundbord aanstuurt plus de komma's van
de displays.
- 6800 CPU: Williams nummer 5A-8987, Bally nummer E-620-28, Motorola nummer SC44216P.
- 6821 PIA: Williams nummer 5A-8972, Bally nummer E-620-29, Motorola nummer SC44067P.
- 6810 RAM: Williams nummer 5A-9003, Bally nummer E-620-30.
- 6808 CPU: Williams nummer 5A-9150.
- +5 volt gestabiliseerde gelijkspanning voor de logica
- +12 volt ongestabiliseerde gelijkspanning (Williams noemde dit de "ongestabiliseerde 5 volt")
- +100 and -100 volt gelijkspanning voor de displays.
- +28 volt gelijkspanning voor de spoelen.
- +18 volt gelijkspanning voor de lampmatrix.
- 6 volt wisselspanning voor de General Illumination (continu verlichting)
- 300 volt gelijkspanning (alleen in Hot TIp en Lucky Seven)
- -12 volt gelijkspanning vanaf system 7.
- 50 volt gelijkspanning voor de flipperspoelen(alleen bij de drie laatste system 7 kasten).
Op het driverbord zitten de overige drie PIA's, een is verantwoordelijk voor het aansturen van de spoelen, de volgende stuurt de lampjes aan en de derde tenslotte is verantwoordelijk voor het uitsturen van 8 switchkolommen en tevens het uitlezen van de 8 switch rijen.
PIA's worden door de microprocessor in feite gewoon als RAM geheugens gezien en zodra een PIA defect raakt en dus niet meer door de processor kan worden gelezen of beschreven zal deze vastlopen, of wat vaker voorkomt, in een oneindige wachtlus terechtkomen. Om deze reden zal een CPU bord ook niet willen starten (booten) zonder dat het driverbord is aangekoppeld.
Slechts dankzij de testeprom van Leon is het vandaag de dag mogelijk om een CPU bord zonder aangekoppelde driver op de werkbank te testen.
De PIA's zijn makkelijk herkenbaar omdat het de grote 40 pens IC's zijn, geen zorgen als er niet 6821 op staat maar iets totaal anders, Williams (en Bally ook) kosten deze IC's in dermate grote hoeveelheden dat deze speciaal voor hen werden geproduceerd onder een eigen nummering:
Een PIA's is beslist niet in staat om rechtstreeks een spoel of lamp aan te
sturen, de hiervoor benodigde elektrische stroom is veel te groot en kan niet
door de uitgangen van een PIA worden geleverd.
Om toch een component te besturen wordt gebruikt gemaakt van logische poorten en
buffertrappen, voor- en tenslotte eindversterkers.
De logische poorten in de schakeling worden tevens gebruikt om de schakeling
onder controle van bijvoorbeeld de blanking te houden.
De voeding
Een flipperkast heeft een vrij groot aantal voedingsspanningen nodig welke deels
vanaf de voedingsprint komen en deels van los in de kast geplaatste
gelijkrichters.
Alle system 3 t/m 7 kasten hebben de volgende voedingscircuits:
De system
6 voedingsprint van een Firepower, geen verlichtingszekeringen, geen GI
relais en geen GI connectoren.
|
| Een system
7 voeding (Jungle Lord en latere kasten), de zekeringen voor de algemene
verlichting en het GI relais zitten bij deze versie op de print
gemonteerd. (De GI connector voor de verlichting is hier duidelijk verbrand) 
|
| De
brugcellen voor de lampmatrix en spoelen samen met de grote (Big
Blue) condensator in een late Black Knight (of een Jungle Lord). Het GI relais zit bij deze kasten op de voedingsprint en niet op de bodem van de kopkast.(bij de meeste Black Knights in NL zit dat relais hier wel en de trafo ook) 
|
| Hier zie
je een G.I. relais in een Black Out, Scorpion of vroege
Black Knight met de transformator rechts ernaast. Deze kasten hebben ook nog het oudere type voedingsprint zonder relais. 
|
-
De twee bruggelijkrichters zitten tegen de achterkant van de kop aangeschroefd
en richten de wisselspanning van de transformator gelijk, eentje de spanning
voor de lampmatrix (dus de comnputer bestuurde lampjes) en de andere zorgt voor
de gelijkspanning voor de spoelen.
De grote condensator die we ook wel "Big Blue" noemen staat er op de bodem van de kop vlakbij en dient voor het afvlakken van de gelijkspanning voor de lampmatrix.
Een ander verwarrend deel van de voeding is de ongestabiliseerde 12volt. Ten eerste noemt Williams dit de ongestabiliseerde 5 volt terwijl het gewoon echt 12 volt is die echter door het ontbreken van een stabilisator ergens tussen de 10 en 14 volt zweeft en ter plekke van de voedingsconnector op het CPU bord zelfs nog lager. Door het stijgen van de netspanning in europa (220volt is 230 geworden) zal deze spanning ook wat hoger uitvallen, dit is geen enkel probleem overigens maar trap er niet in om een reparatie te willen uitvoeren omdat deze spanning wat lager of hoger is.
De paar
laatste system 7 flipperkasten hadden het hier onder afgebeelde flipper
voedingsprintje apart in de kopkast zitten, het gaat om de kasten Firepower
II en LaserCue (en in theorie ook Starjet) Deze extra voeding leverde de
50volt voor de flipperspoelen (50volt ipv 28) waardoor deze kasten veel
betere flipperaktie hadden.
|
Het soundbord (geluidsbord).
Het geluid is bij de eerste elektronische flipperkasten voor bijna alle fabrikanten
een twijfel geweest, men was als de dood dat de spelers het typische geluid van
een elektromechanische kast zouden gaan missen en er werden dan ook in eerste
instantie bellen in de kasten geplaatst en zelfs neptelwerken om het geluid van
een EM kast maar zoveel mogelijk na te doen.
De fabrikanten vergaten echter dat de wereld om hen heen langzaam ook gewend aan
het raken was aan moderne elektronische geluiden, voorzichtig werden de eerste
geluidsprintjes in de kasten uitgeprobeerd, deze nog zeer simpele bordjes maakten
voornamelijk piepgeluidjes en pas later werden de geluiden spannender, toch
hadden alle printen een instelmogelijkheid om terug te kunnen vallen op "chimes"
als geluid want je wist immers maar nooit.
De eerste 2 solidstate flipperkasten van Williams, Hot Tip en Lucky Seven,
hadden dus nog een mechanische xylofoon net als EM kasten(plus een neptelwerk
onderin) World Cup was de eerste Williams flipperkast die elektronisch geluid
produceerde.
De soundbordjes zijn in feite stand-alone computertjes, ze hadden een eigen
microprocessor, voeding IO enz. De hoofdcomputer van de kast "zag"
niet eens dat het soundbord aanwezig was maar stuurde de impulsen die ooit voor
de bellen bedoeld waren gewoon naar het soundbord. System 3 en 4 kasten hadden
het soundbordje nog onderin de kast zitten op de plaats van de voormalige
bellen.
Het eerste
type Williams system3/4 soundbord.
|
Vanaf World Cup (system 3) t/m Pokerino (system 4) werd er een soundbordje
gebruikt wat geluiden maakte zodra de speler ergens iets scoorde, dus net als
bij een kast met bellen, de rest van de tijd was het gewoon stil(een paar van de
allereerste World
Cup's hadden trouwens nog bellen).
Vanaf Flash (system 4) werd een gewijzigd soundbord gebruikt wat ook
achtergrondgeluid produceerde. Dit geluid kon variëren in toonhoogte als je
bijvoorbeeld flink scoorde zodat de speler flink in het spel kon opgaan.
Met de komst van Gorgar (system 6) werd de spraak geïntroduceerd in de wereld van de flipperkast. Een totaal nieuw ontworpen soundbord met een aangekoppeld printje waar de soundsamples in eprom op zaten zorgde voor een vocabulaire van zeven woorden waarmee Gorgar vriend en vijand (en concurrent) versteld deed staan(of de stuipen op het lijf joeg met de griezelige gesamplede hartslag die de kast produceerde). Dit type soundbord werd tot het eind van de serie gebruikt alhoewel het spraakbordje verviel na de productie van Pharaoh, Gorgar, Firepower, Blackout, Alien Poker, Jungle Lord en Pharoah waren de enige pratende kasten en door de afnemende vraag naar flipperkasten werd er overal bezuinigd op de gebruikte onderdelen dus spraak verviel ook. Solar Fire en alle latere kasten hadden nog wel hetzelfde soundbordje maar zonder de connector voor het spraakbord, spraak was dus zelfs geen optie meer.
Het aansturen van het soundbord gebeurde vanaf Black Knight niet meer met de transistoren voor de bellen op het driverbord maar vanaf een aparte uitgang (en extra PIA) op het CPU bord. Gevolg hiervan was dat er een aantal transistoren vrijkwamen voor het besturen van spoelen zodat de kasten weer verder konden worden uitgebreid.
| Een system
6/7 soundbord met aangekoppeld spraakbord(Black Knight). Williams had zo weinig vertrouwen in het spraakbord dat er op het soundbord (de rechter print) een aparte jumper zat waarmee het spraakbord kon worden omzeild en de kast met verwijderd spraakbord nog wel de standaard geluidjes kon maken. Op het soundbord rechtsboven zie je nog altijd een dipswitch zitten waarmee het bord kan worden omgeschakeld naar een imitatie van bel geluidjes. 
|
-
Displays
- Het system 7 CPU bord heeft een extra PIA voor de aansturing van het soundbord en de komma's op de displays.
- System 7 kasten en de 2 laatste system 6 kasten hebben een nieuw type master display bord en zeven digit displays.
- De drie laatste system 7 kasten hadden 50volt flippers en daar een apart gelijkrichterbordje voor en een extra wikkeling op de transformator.
- De voeding is totaal herzien omdat dit toch een zwak punt in de kasten bleek te zijn.
Williams gebruikte standaard verkrijgbare zes digit gasgevulde displays in bijna alle system 3 t/m 6 kasten, dit type display is vandaag de dag nog altijd verkrijgbaar hoewel de prijs van een LED display langzaam zakt en de gasdisplays steeds duurder worden. Mocht je een nieuw display willen monteren bedenk dan dat alle vervangingsdisplays tegenwoordig een glazen nippel aan de achterkant hebben terwijl lang niet alle printjes een gat hiervoor hebben, dit kan montage behoorlijk problematisch maken. Alle system 7 kasten en de laatste 2 system 6 kasten (Alien Poker en Algar) hebben 7 digit displays.
Gezien de zeer hoge prijzen van originele gasdisplays is het echter al snel lonend om een setje LED displays aan te schaffen.
Er zijn op dit moment 2 leveranciers van LED displays,
in Duitsland is dat Pinled en in de USA is dat Pinscore.
Beide displays werken prima in de kasten, die van Pinscore zijn echter beduidend mooier maar helaas ook een flink stuk duurder. De displays van Pinled zijn veel te fel en u moet er een folie bij aanschaffen (vreemd genoeg tegen meerprijs) om deze ontwerpfout te corrigeren.
Helaas zijn er ook bepaalde handelaren in oude voorraden die displays aan de man brengen als zijnde nieuw, deze displays met prijzen van 25 euro en lager hebben meestal al 30 jaar of langer opgeslagen gelegen, ze zullen na montage meestal nog enkele maanden werken waarna u weer van voor af aan kunt beginnen.
Het master displaybord(system 3/6) of display driver bord(system 6a/7)
Het master display bord in system 3 t/m 6 kasten bord zit aan de voorkant van
het draaiende houten paneel in de kopkast geschroefd en bevat tevens het credit/ball-in-play display, de vier speler
displays zijn verbonden met side edge connectoren die beslist niet verwisseld
mogen worden. Het
displaybordje neemt de signalen van het CPU bord over en buffert die naar de
hoogspanning waarmee het glazen display wordt gestuurd. Vanaf system 7 zat het
master display bord aan de achterkant van het houten paneel en werden de
displays er via flatcables mee verbonden die wel verwisseld mogen worden.
Er zijn twee versies van het master display bord, heowel versie één zowel met IC's als losse transistoren is gebouwd dus in feite zijn er drie versies. Alle uitvoeringen van het bordje zijn uitwisselbaar binnen dezelfde generaties.
Het Williams system 7 CPU bord
Op het eerste gezicht ziet een beginner weinig verschillen tussen de generaties
printen maar de system 7 CPU is er toch wat makkelijker tussenuit te vissen, ten eerst zit er een klein 7 segments led displaytje op het
bord maar ook de zes epromvoeten midden op het bord zijn makkelijk herkenbaar.
De architectuur van het bord is zo goed als gelijk aan zijn voorganger met dien
verstande dat bij system 7 de 2 6810 static RAM's vervangen zijn door 2 2114
dynamische RAM's (die ook wat meer geheugenruimte geven), ook is er een extra PIA aan het bord toegevoegd die het
soundbord aanstuurt (waardoor er dus op het driverbord uitgangen vrijkomen voor
andere zaken), deze extra PIA stuurde ook de komma's aan op de displays.
Het bord is aan de rechter zijkant voorzien van soldeereilandjes voor een extra
uitgang die echter nooit is gebruikt.
Om de backwards compatibiliteit te waarborgen heeft de print nog altijd de
dispswitches en de 2 diagnose LED's (of alleen de soldeereilandjes ervoor)
Later tijdens de system 7 productie is de "backwards compatibilteit"
langzaam aan het verdwijnen door het weglaten van de dipswitches en de Ledjes. Williams
ontdekte waarschijnlijk dat er geen gebruik meer van werd gemaakt omdat de
system 3-6 kasten intussen waren uitgeëxploiteerd, men kon dus een
kostenbesparing doorvoeren.
Omdat de print zelf ongewijzigd bleef is het vrij simpel de weggelaten
componenten alsnog toe te voegen.
Het aantal beschikbare spoelen in system 3 t/m 7 flipperkasten|
Eén van de zeer goede dingen aan het Williams ontwerp was het ruime aantal
stuurtransistoren op het driverbord. In tegenstelling tot het Gottlieb
system 80 ontwerp waar er in feite slechts 6 transistoren geschikt waren voor
het aansturen van spoelen had Williams maar liefst 16 direct bestuurbare
uitgangen en nog eens zes "speciale" uitgangen die voor popbumpers en
slingshots werden gebruikt, een totaal dus van maar liefst 22 spoelen.
Met de komst van system 7 ging het aantal spoelen wat op het speelveld
kon worden ingezet nog eens omhoog omdat de vijf uitgangen voor de bellen nu
vrijkwamen door de komst van een extra PIA op het CPU bord die deze taak
overnam.
Transistoren 9,10,11,12,13 werden voor die tijd gebruikt voor het geluid/bellen.
De nieuwe PIA had trouwens ook nog 2 uitgangen over voor spoel 23 en 24
die nooit gebruikt zijn, in de "Blue" Flipperroms zitten er zelfs
testroutines voor, de betreffende uitgangen lopen op de print naar de niet
gemonteerde dubbelrijïge connector op de rechterzijde van de print. Of het de
bedoeling was om een expansionboard zoals in Twilight Zone toe te passen of dat
men een nieuw ontwerp voor een driverbord in gedachten had (aangestuurd via een
flatcable dus zonder de interboard connector) is nooit bekend geworden.
In de diagnotics van de Blue Flipperroms zit trouwens ook nog spoel 25, dit is
het Flipper Enable Relais.


